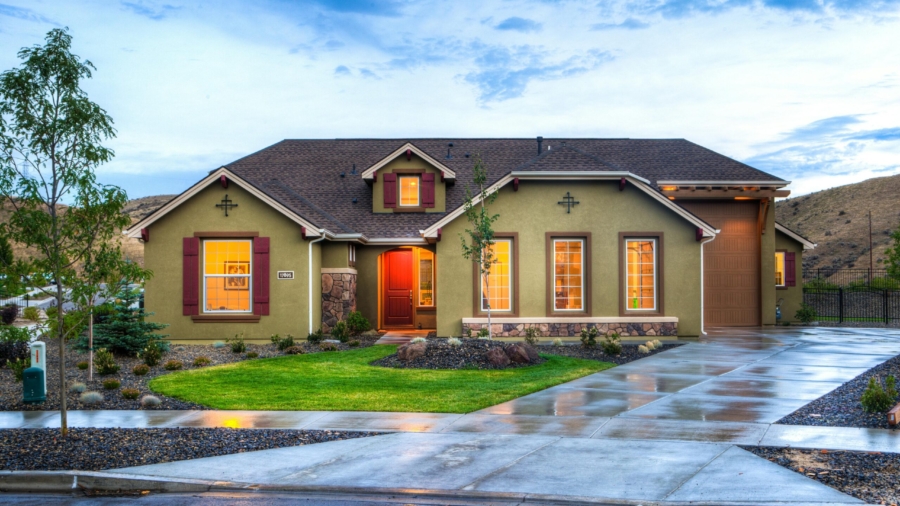
Real estate photography is a critical aspect of the property market, playing a significant role in attracting potential buyers and showcasing properties in their best light. High-quality photographs can make a difference in how quickly a property sells and the final sale price. In this comprehensive guide, we will explore the importance of real estate photography, tips for capturing stunning images, equipment recommendations, and best practices to elevate your property listings.
Table of Contents
Why Real Estate Photography Matters
In today’s digital age, the first impression of a property is often formed online. Listings with high-quality photos receive significantly more views and inquiries compared to those with poor-quality images. Here are some key reasons why real estate photography is essential:
- First Impressions: High-quality photos create a strong first impression, which can lead to more interest and inquiries.
- Increased Engagement: Listings with professional photos get more clicks and longer viewing times.
- Higher Perceived Value: Professional images can make properties look more valuable and desirable.
- Faster Sales: Properties with high-quality photos tend to sell faster than those with amateur images.
- Better Representation: Accurate and appealing photos give potential buyers a realistic view of the property, reducing the likelihood of disappointment during a physical visit.
Tips for Capturing Stunning Real Estate Photos
Capturing the perfect real estate photos requires skill, the right equipment, and an understanding of what potential buyers want to see. Here are some tips to help you get started:
1. Use the Right Equipment
Investing in good photography equipment is crucial. Here are some essentials:
- Camera: A DSLR or mirrorless camera with a wide-angle lens is ideal for capturing spacious interiors and detailed exteriors.
- Tripod: A sturdy tripod ensures stability and consistency in your shots.
- Lighting: Natural light is best, but additional lighting equipment like softboxes can help in dim areas.
- Editing Software: Post-processing tools like Adobe Lightroom or Photoshop can enhance your images and correct any imperfections.
2. Master Composition and Angles
- Wide-Angle Shots: Use a wide-angle lens to capture more of the space, making rooms appear larger and more inviting.
- Rule of Thirds: Apply the rule of thirds to create balanced and visually appealing compositions.
- Angles: Shoot from corners to give depth to the room and avoid shooting straight-on, which can make the space look flat.
3. Optimize Lighting
- Natural Light: Utilize natural light by shooting during the day and opening curtains and blinds.
- Avoid Overexposure: Ensure that your images are well-exposed, avoiding overly bright or dark areas.
- Supplemental Lighting: Use additional lighting to highlight features and reduce shadows in darker areas.
4. Stage the Property
- Declutter: Remove personal items and clutter to create a clean and inviting space.
- Furniture Arrangement: Arrange furniture to highlight the functionality and flow of the space.
- Decor: Add tasteful decor elements to enhance the visual appeal without overwhelming the scene.
5. Post-Processing
- Color Correction: Adjust the colors to ensure they are true to life and appealing.
- Sharpness and Clarity: Enhance the sharpness and clarity to make details stand out.
- Perspective Correction: Correct any distortions to ensure straight lines and balanced proportions.
Equipment Recommendations
Investing in the right equipment can significantly improve the quality of your real estate photos. Here are some recommendations:
- Cameras: Canon EOS R5, Nikon D850, Sony A7 III
- Lenses: Canon EF 16-35mm f/2.8L III, Nikon NIKKOR Z 14-30mm f/4 S, Sony FE 12-24mm f/4 G
- Tripods: Manfrotto MT190XPRO4, Gitzo GT3543LS, Benro Mach3 TMA38CL
- Lighting Kits: Neewer 2-Pack Dimmable 5600K USB LED Video Light, Godox SL-60W, Aputure Light Storm LS C120D II
Best Practices for Real Estate Photography
To consistently produce high-quality real estate photos, follow these best practices:
- Plan Your Shoot: Schedule your shoot during the day to take advantage of natural light.
- Prepare the Property: Ensure the property is clean, decluttered, and staged appropriately.
- Take Multiple Shots: Capture multiple shots from different angles to provide a comprehensive view of the property.
- Edit Carefully: Spend time in post-processing to enhance your images without over-editing.
- Stay Updated: Keep up with the latest trends and techniques in real estate photography.
FAQs about Real Estate Photography
Q: What is the best time of day to take real estate photos? A: The best time to take real estate photos is during the day when there is plenty of natural light. Early morning or late afternoon provides softer lighting that can reduce harsh shadows.
Q: How important is staging in real estate photography? A: Staging is very important as it helps potential buyers visualize the space and its potential. A well-staged property looks more inviting and functional.
Q: Can I use my smartphone for real estate photography? A: While smartphones have advanced cameras, they may not provide the same quality as a DSLR or mirrorless camera, especially in terms of wide-angle shots and low-light performance.
Q: How many photos should be included in a real estate listing? A: A typical real estate listing should include around 20-30 high-quality photos that cover all key areas of the property, including interiors, exteriors, and unique features.
Q: Do I need to edit my real estate photos? A: Yes, editing is essential to enhance the quality of your photos, correct any imperfections, and ensure they accurately represent the property.
Conclusion
Real estate photography is a vital component of the property marketing process. High-quality images can significantly impact a property’s marketability, attracting more potential buyers and ultimately leading to faster sales. By using the right equipment, mastering composition and lighting, and following best practices, you can create stunning real estate photos that showcase properties in their best light. Remember, investing time and effort into capturing and editing your images will pay off in the long run, making your listings stand out in a competitive market.


Add a Comment